Saturday, December 10, 2011

Ornament Swap

Guess what I got in the mail today??


Last month Lindsay organized a Holiday Ornament Swap and today I received this bundle of fun. I was lucky to have Kelly as my partner who made me an ornament. But she did much more than just make an ornament! She also made a cute card with a button tree and included a generous amount of scraps and chocolate. Really, what is better than fabric and chocolate?  

Kelly is also having a giveaway on her blog right now, so hop on over there and enter!

Want to see what I made for my partner? Well, I am such a professional blogger that I forgot to take any pictures of it before I sent it off, but thankfully my partner did! 


Can I just say that I was a bit intimidated to make an ornament for Lindsay? Seriously, the girl is awesome and even just announced that she has a project in the new book Fabric by Fabric: One Yard Wonders. Lindsay is also having a giveaway on her Lindsay Sews blog right now if you'd like to stop by and enter that one, too!

Be sure to stop back here on Monday for my contribution to the  Sew, Mama, Sew Giveaway Extravaganza!


Thursday, December 8, 2011

Maxwell James

Today this squidgy little bundle turns one year old!

Unfortunately, our celebrating has been put on hold due to the plague descending upon our home. Back to the laundry I go!


Wednesday, December 7, 2011

WIP Wednesday, vol 16

Well, it is an unofficial WIP Wednesday as Lee is taking a well-deserved holiday break. But, I actually have some works in progress, so I thought I would share. 

First up, I've gotten a quarter of the blocks made for my Road to Tennessee quilt.

I'm having a hard time deciding which way to position the blocks. I think the top to rows are the more traditional way, but I kind of like the way the bottom rows are, maybe even have that zigzag type design going vertically down the quilt instead of horizontally. Maybe with a little sashing? Not sure I'm that ambitious... Suggestions?

Here's a little sneak at the next pillow that I'm working on. I've got all the dresden pieces made but I'm still indecisive on the rest of the design. I've never made a dresden before, but have been wanting to try them, especially after seeing the cute ones made by Alli and Amy


I need to make a baby gift for some friends of ours. They are having a boy and I think this fabric is perfect for him, but I'm having a hard time deciding on coordinating fabrics. This is the only fabric from that line that I have and I'm trying to work from my stash, so I keep pulling groups of fabric out then putting them aside for others. Needless to say I am making a mess and not much progress. I may even decide to just make bibs and burp cloths or something like that instead of a quilt. The baby will likely be here in two weeks or less, so I need to get on this!

What are you working on?

Tuesday, December 6, 2011

Mini 'X' Christmas Pillow

When Debbie posted the tutorial for her Mini 'X' quilt, I knew I would by making one. I'm not sure why, but I decided it needed to become a pillow. Maybe because I know my track record about how slow I am getting things hung on our walls and I knew I would want this out on display. With a pillow I just have to throw it on the couch, so a pillow it will be!

This was such a quick and fun project. Debbie did an excellent job writing the tutorial. The only thing I changed was to only make 9 x's instead of 12. Also, somehow my top didn't come out as square as it should have, so I had to make my borders a little wonky so I could keep the design centered on my pillow. 


The fabrics I used are from Holiday Happy by Happy Zombie. I love the red and aqua and the Santa gnomes are fun, too!

The fabrics were from a bundle of 5" strips that I won earlier this fall. Having those pre-cut strips really helped speed up the process, especially when trying to decide on the back of the pillow.  This is actually the first pillow I've made, but it was so fun it will not be the last! 

To see some more versions of Mini 'X' quilts, check out the flickr group Quilting with A Quilter's Table.

Linking to Fabric Tuesday at Quilt Story.


Cinnamon Salt Dough

            Does anyone else have memories of making salt dough ornaments 
 at Christmas when you were a kid? 


My mom wasn't a big fan of letting us make a mess in her kitchen, but I do remember that she always let us make these ornaments. We just used plain salt dough and painted them after they came out of the oven. I've seen a few recipes for adding cinnamon to the dough which makes the house smell great and produces a pretty brown ornament, so that is what the older boys and I did this morning. 

This is what Max did...

We had fun mixing up the dough, rolling it out, and deciding which cookie cutters to use. The dough is pretty stiff so I told Wyatt that I should probably be the one to roll it out. He let me the first time, but then he told me about his big muscles, so I let him have a turn.

He decided it was necessary to climb onto the counter to do it. Which of course meant that pretty soon Carson was up there, too. But he had a little different idea of how to roll out the dough...
Sometimes you need to break out the heavy equipment.  
 Here's the recipe in case you want to make your own:
 
Cinnamon Salt Dough Ornaments

1 C. cinnamon
2 C. flour
1 C. salt
1 ¾ C. warm water

Mix the cinnamon, salt, and flour in a mixing bowl. Add the water and stir or use a stand mixer with a paddle or dough hook to combine. The dough will be very stiff. Knead a few times with your hands, then roll out on a surface lightly dusted with cinnamon. Place on a cookie sheet lined with parchment paper and poke a hole with a straw or toothpick. Bake at 300° for 45 to 50 minutes, or until dried.

One side stays dark but the other gets a little lighter.
I was looking for some ribbon to string them on and found a few strips of fabric in my scrap box, so I used that instead. Much more fun, I think!


We always go out and cut our Christmas tree, but I wanted a little one for the kids' playroom so I got them a pre-lit 4-ft tree and plan on letting them make all the decorations for it. I'm also hoping that Max will get used to that tree and won't mess with ours too much once we get the real one. I doubt it will work, but we'll see!

I'll be linking these babies up to Debbie's Tuesdays at the Table. Stop by and see what everyone else is cooking up! I'll bet there are some Christmas cookies this week!

Friday, December 2, 2011

Those 241 Totes and Some Tips

You know what's hard? Making something and not sharing it. 
You know what's really hard? Making three things and not sharing them!

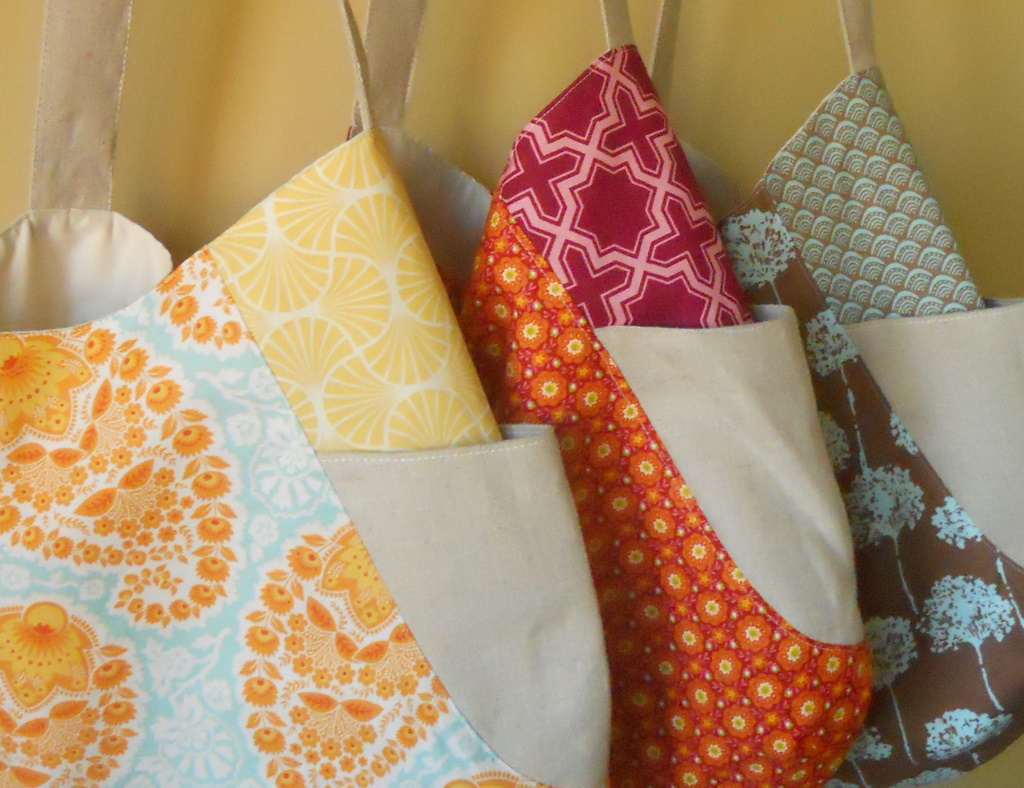
Now that my Pay it Forward gifts have been received I can finally show them. I know, all the cool bloggers have secret projects and when they get to do their big reveal it's something like a book deal! Or fabric line! Or sponsors! And here I am revealing...bags. But they were fun to make, and hey, any finish at this house deserves some fanfare!

I used the wonderful 241 Tote pattern by Anna of Noodle-heads. Such a great pattern! I highly recommend it. The first bag I made went to Sarah at FairyFace Designs


Since I made her's first, Sarah's bag was a bit of a learning experience. Not that there were any problems due to the pattern or anything, it just took a little longer and I made a couple minor changes to the next two. 

Next, I made one for Annabella of Life's Rich Pattern...
and one for Jennifer of Knotted-Thread.
I made the second two assembly-line style and they went together much quicker. These bags use a magnetic snap, and for some reason I thought it would be more complicated than it was. It was so simple! I will say that on Sarah's I used one from JoAnn's and it almost sticks together too well. Like, I hope she doesn't have to use two hands to get her bag open! For the others I used snaps that I purchased from Being Bags on etsy. Besides being a much more economical way to go, I thought these snaps seemed higher quality. Also, I noticed the other day at Joann's that if you buy the magnetic snaps from the Notions section, they are quite a bit more than the ones from the bag-making aisle, where the purse handles and those kind of things are. 

I did a couple things to the bags (maybe not on Sarah's...sorry, Sarah) that I think helped them look a little more professional.
See how that stitching going along the top of the linen is a little more substantial? I used the double-stitch feature, so the needle goes over the same stitch twice. I totally don't know if that is the right thing to call it, but that's what I'm going with. Here's what it looks like on my machine...
That number 3, there? That's it. I would guess that most machines have it, but it may have a different picture for it. I'm pretty sure my old (err, 1982 model...not OLD) Singer had it. I also used that stitch when doing the top-stitching on the straps. 

Here's another thing that helped my top-stitching...
Here's the back...
Do you have one of these? It is a blind-hem foot and came with my machine. See how it has that ridge in the middle and the other part is a little higher? If you use this foot and move your needle over a bit, you can put the edge of the fabric you are top-stitching right where that ridge is and it will kind of glide right along that and keep your stitching straight. Does that even make sense? Ok, I just ran to the machine and took these pictures to help, since I don't think I'm making any sense...

Better? And yes, that's felt but it was what was on the table. I moved my needle over 10 clicks (2.5) to the left. Here's the top-stitching on Annabella's bag:

Much better than what I can do with just the regular foot on my machine. I don't know if any of you even care, but I thought I'd share since every bit helps for me.

I can definitely see myself making more of these bags and I just bought Anna's Go Anywhere Bag pattern, so I'll hopefully be trying it out soon as well.

Thursday, December 1, 2011

Fresh Sewing Day

It's December 1st and that means another Fresh Sewing Day at Lily's Quilts.


I have to say that when I started looking back through November I was surprised to see that I've actually gotten a few things accomplished. 


We also concluded Free Motion Fridays with Cindy at Fluffy Sheep Quilting. I enjoyed all the designs and can see definite improvement since my first attempts. 

And here is a little peek at some undercover sewing I did this month but haven't gotten to share yet.


All packages have been received, so you'll hear more about these tomorrow!