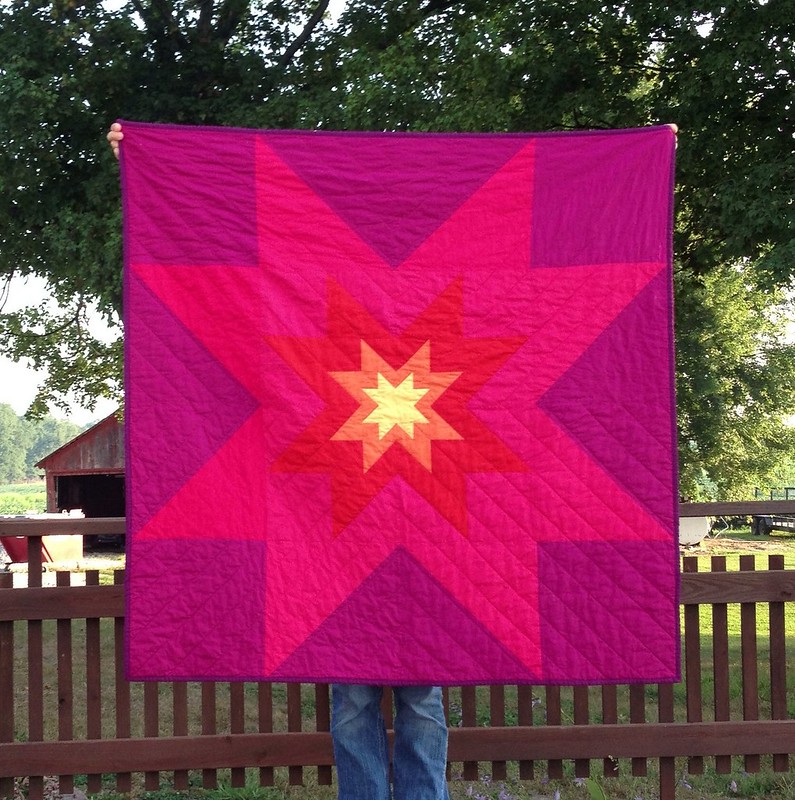
While I was making my Star Flare quilt, I had thought about making a tutorial for it but really wasn't sure if anyone would be interested. Well, when Dana put in her request I knew I needed to listen!
This is a simple quilt to make and though mine is in solids, I think it would look really cool in prints, too.
In this tutorial, I'll be referring to the fabrics we use as F1 through F5, with 1 being the inner star and working out from there. In my original version of the quilt, the fabrics that I used were Kona Cheddar (F1), Bella in Clementine (F2), Kona Tomato (F3), Kona Pomegranate (F4), and Kona Berry (F5).
Materials:
F1: Fat Eighth or Fat Quarter
F2: Fat Eighth or Fat Quarter
F3: 1/2 yard
F4: 1 yard
F5: 1.5 yards
Finished size: 48" square
Seam Allowance: scant 1/4"
Cutting:
F1: (1) 3.5" square, (4) 2.5" squares
F2: (4) 2" squares, (4) 2.5" squares, (4) 4" squares
F3: (4) 3.5" squares, (4) 4" squares, (4) 7" squares
F4: (4) 6.5" squares, (4) 7" squares, (4) 13" squares
F5: (4) 12.5" squares, (4) 13" squares
Instructions:
1. Pair up your F1 and F2 2.5" squares, right sides together. Draw a diagonal line through the center of each pair and sew a line a scant 1/4" on either side of your drawn line. Cut on the drawn line and press your seams. Trim the resulting HSTs to 2".
2. Sew the 2" squares of F2 to either side of the HSTs as shown in the diagram, then assemble your first star. Trim to 6.5" square.
3. Pair up your F2 and F3 4" squares and make four HSTs as described in Step 1, but trim to 3.5" square. Using your block from Step 2 as the center square, assemble the next round as shown using the 3.5" squares of F3. Trim block to 12.5"
4. Pair up your F3 and F4 7" squares, make HSTs, and trim to 6.5". Use your block from Step 3 as the center and assemble the next round the same way that you did previously, with the 6.5" squares of F4 on either side of your 6.5" HST. Your block should now be 24.5".
5. Pair up your 13" squares of F4 and F5, make HSTs and trim to 12.5". Using your block from Step 4 and the 12.5" squares of F5, assemble your final round.
6. Assemble your backing, baste, and quilt as desired.
If you need help finishing your quilt, Amy Smart from Diary of a Quilter has an excellent Beginning Quilter Series with tutorials for all the steps you'll need. If you have any other questions, I'm always here to help, too. My contact info should be up there at the top of the page.
I would love to see pictures of your quilts if you make one using my tutorial!
Feel free to email me or leave a link in the comments!


Thanks for all the measurements, I forsee a shooting star's worth of these soon!
ReplyDeleteOoooooo!!! I'm soooo excited! Now I have to hunt down the fabrics and make my own Star Flare! Thanks a million for sharing a tutorial!
ReplyDeleteLove it, thanks!
ReplyDeleteGood for you Toni. I'm sure this will be very popular!
ReplyDeleteLove it! This is definitely going on my short list. Thank you!
ReplyDeleteI love this quilt/block. So glad to see the tutorial!!!!
ReplyDeleteBeautiful quilt and great tutorial!
ReplyDeleteBrillliant!
ReplyDeleteLove this quilt. Really love it, thanks for the tute!
ReplyDeleteThanks for the tutorial! It's such a cute quilt! :)
ReplyDeleteVery cool star! Thanks for the tutorial :)
ReplyDeleteThis is so fabulous!
ReplyDeleteThanks for sharing this as a tutorial - I love it!
Awesome!
ReplyDelete